|
环境:
TPTP-4.4.0 all-in-one包:tptp.runtime.allInOne.win32.win32.x86-TPTP-4.4.0.3.zip
TPTP的Automated GUI Recording插件: org.eclipse.tptp.test.auto-TPTP-4.4.0.zip
简介:
TPTP的GUI录制和回放工具( Automated GUI Recorder, 简称AGR )是基于TPTP测试框架开发的。它允许用户记录Eclipse平台上的GUI动作,以及其回放。
局限性:
1. User actions on native dialogs cannot be recorded because SWT events based on the actions are not reported.
2. Keyboard shortcuts are not recorded when object-based recording is enabled.
3. Position based recording is only supported for areas within the workbench where SWT reports mouse/keyword events.
4. When selecting a local tool bar item of a view, ensure that focus is first given to the view before the tool bar item is selected.
录制方法:
1. 创建一个 plug-in 项目(test suites必须存储在plug-in 项目里)
File Menu > New > Project > Plug-in Development > Plug-in Project > Next.
2. 命名为TestGUI,选上'This plug-in will make contributions to the UI' is checked',
不用选 'Create a plug-in using one of the templates'。
3. 在此项目里,创建一个folder用于存储test suite。命名为'test-resources'。
4. 在此项目的src里,创建一个新的包 'org.eclipse.tests.verification.hooks'
5. 在此项目里,创建test suite,如图1所示
File Menu > New > Other > Test > select TPTP Automated GUI Test
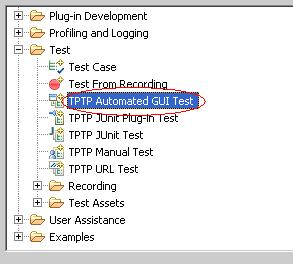
图1
6. 在弹出的New Test Case对话框里,问是否自动增加jar,选择Yes
7. 在此向导里的3个输入框里分别填下,如图2所示,点下一步。
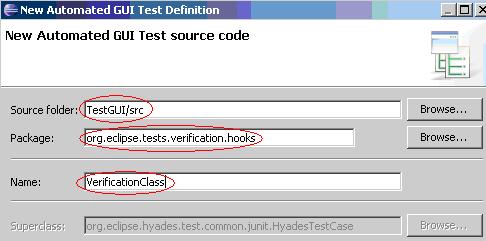
图2
8. 在此向导里,选择文件夹 'test-resources' ,输入 'AutomatedGUISuite'。如图3所示。
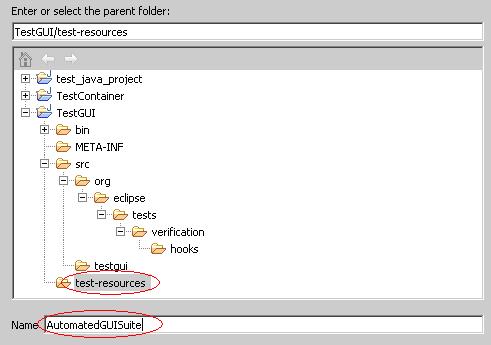
图3
在完成以上的向导后,此项目的目录结构和详细信息如图4、图5所示。

图4
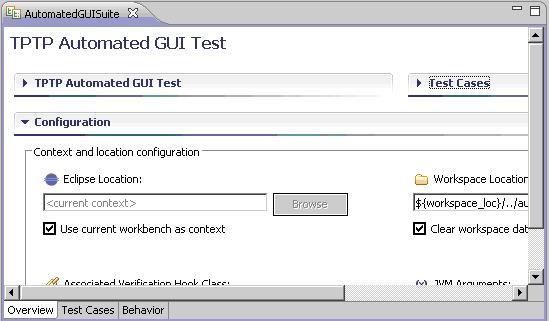
图5
9. 进入Test Cases的Tab,点击“记录”按钮。如图6所示。
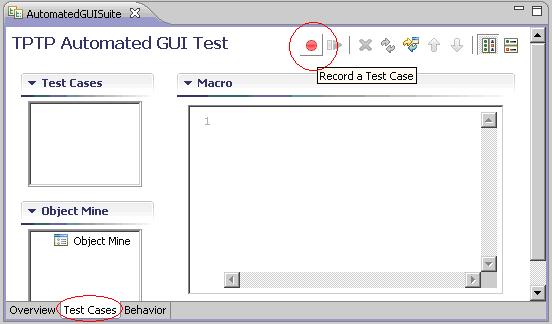
图6
10. 在属性页里,填上测试案例的名字等。完成后,将会出现如图9的录制对话框。这时,所有的eclipse的活动事件都将会被记录下来。
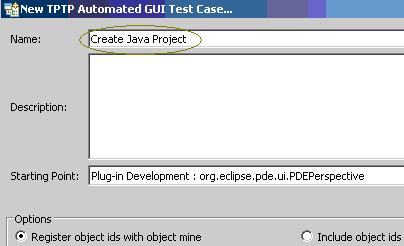
图7
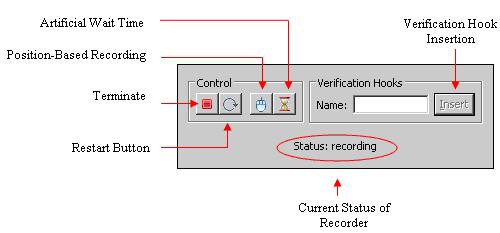
图8
11. 创建一个Java Project
File Menu > Project > Java Project > Next > Specify 'Java Project'
12. 然后点击停止按钮结束录制。如图9所示。
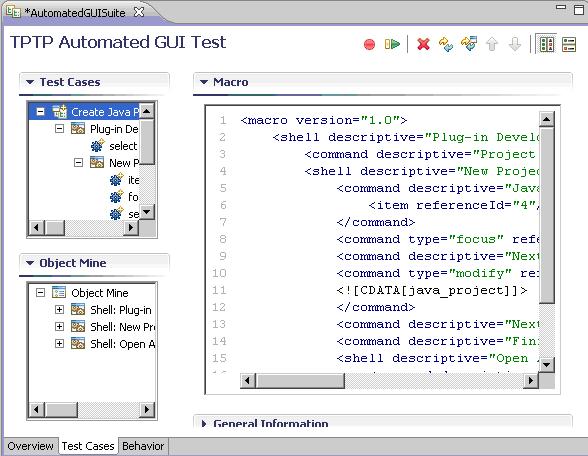
图9
执行方法:
快速模式:
1. 打开这个test suite,转到"Test Cases"页面
2. 选上刚创建的test case,点击"Play Test Case"按钮
标准模式:
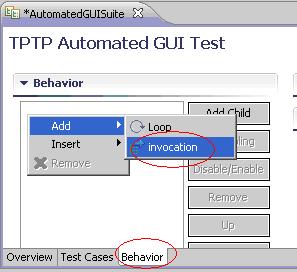
1. 打开test suite,转到 Behavior页,增加一个child -> invocation ->选择 Create Java Project,保存
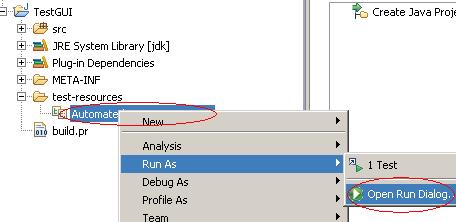
2. 右击 test suite,选择 Run -> Run As -> Open Run Dialog,
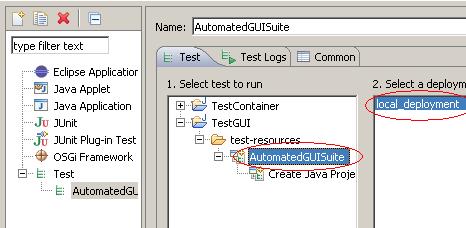
3. 选择 test-resources/AutomatedGUISuite, 运行为 local_deployment
4. 运行将产生一个 .execution 的结果文件,如下图
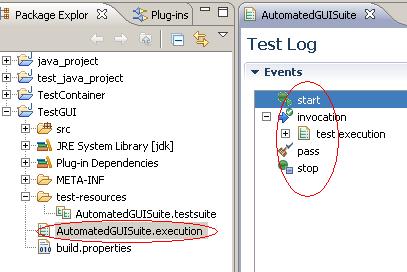
| 


